Beneath the Surface: The Power of Underpainting in Watercolor
- LaLa

- Jul 12, 2025
- 2 min read
Updated: Aug 10, 2025

When we think of watercolor, we often picture translucent layers, luminous washes, and spontaneous brushwork. But behind many beautifully rendered paintings lies a quiet secret: the underpainting. This foundational layer can bring unexpected depth, harmony, and intention to your work — even if it’s never meant to be seen.
🎨 What is Underpainting?
Underpainting is the first wash or layer of color applied before the main painting begins. In watercolor, this layer is often light, transparent, and used to:
Establish values (lights and darks)
Set the mood or atmosphere
Unify the composition
Provide a warm or cool glow beneath the surface
It’s a subtle structure — a whisper beneath the final image.
🧠 Why Use Underpainting in Watercolor?
Unlike opaque mediums like oil or acrylic, watercolor’s transparency allows each layer to influence the next. Underpainting takes advantage of this by:
Creating cohesion: A consistent base tone (like a warm sienna or cool blue) can tie different areas of a painting together.
Enhancing light: A pale yellow or pink base can give skin or sky a lifelike luminosity.
Guiding value: A monochrome underpainting (grisaille) helps you plan where shadows and highlights fall before committing to color.
🔍 Techniques to Try
1. Monochromatic Underpainting
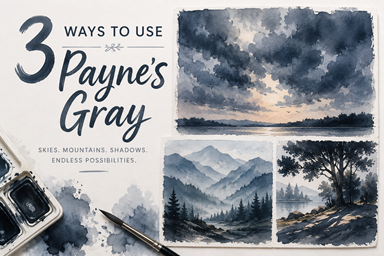
Use a single color (like Payne’s Gray, Burnt Sienna, or Ultramarine) to map out your values. Once dry, glaze over with transparent color.
2. Complementary Wash
Start with a wash in the complement of your subject’s main color. For example, use a soft green base under a red apple. This contrast adds visual vibrancy when layers overlap.
3. Warm/Cool Glaze
Lay down a warm (yellow ochre or light red) or cool (cobalt or cerulean blue) base to influence the temperature of the final image.
4. Textural Underpainting
Create interesting texture with spatter, salt, or granulating colors before painting the main scene. Let these happy accidents inform your subject.
🧪 Pro Tips
Keep it light: The underpainting should not overpower your final layers. Test colors to see how they behave when glazed over.
Let it dry fully: Avoid muddy mixes by letting each layer dry completely.
Think ahead: Plan how your underpainting will interact with the layers above. A muddy base will dull even the brightest glazes.
🖼️ Examples in Practice
In landscape painting, a warm ochre underpainting can mimic the glow of sunlight and bring unity across trees, rocks, and fields.

In portraits, a soft violet or green base can tone down reds in skin and create more realistic flesh tones.

In abstract work, a dynamic, colorful underpainting can peek through and energize the final image.
🌈 The Final Layer Starts First
Underpainting may feel like an extra step, but in truth, it’s where your painting’s story begins. Whether you want to refine your values, set a mood, or add depth, a thoughtful underpainting can be the secret ingredient that brings your watercolor to life.
How about a reference to practice underpainting techniques?
Free downloads below the images!